Pregnancy Test Card: How to Read, Store, and Trust Your Results
Pregnancy test cards are a quick way to check for pregnancy at home or in clinic. They measure hCG, a hormone that appears after an embryo implants. Reading the card is simple if you know what the lines mean, when to test, and how to avoid mistakes. This guide gives clear steps to read results, tips for timing and storage, and signs that mean you should see a doctor.
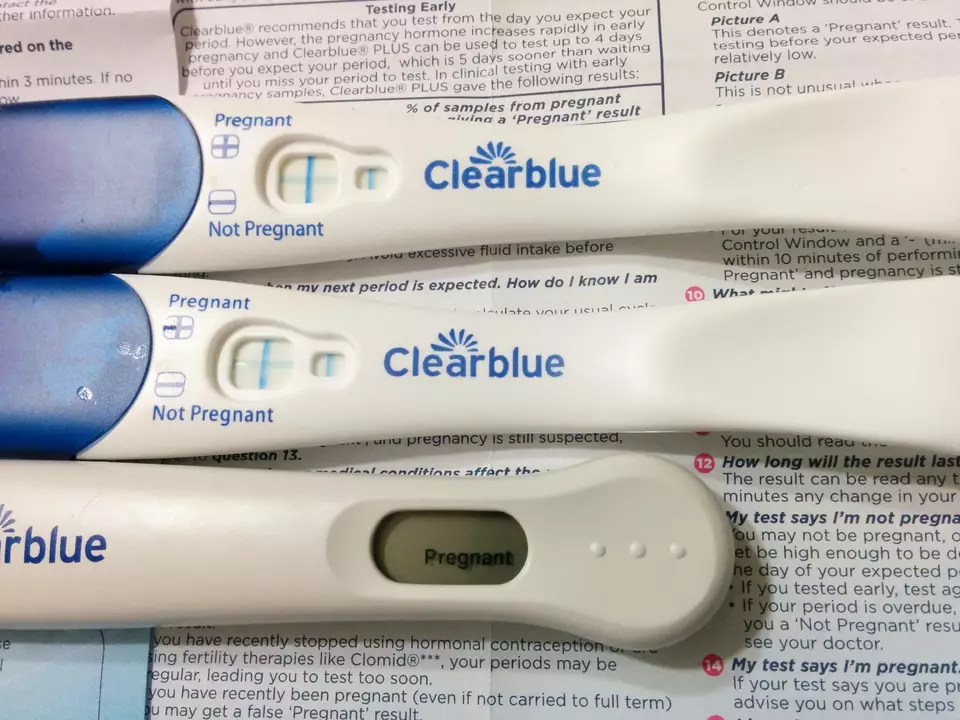
Most cards have two windows: a sample window and a result window. The sample window is where you put urine. The result window shows one or two lines or a symbol. One line usually means negative, two lines mean positive. Some digital cards show words like 'pregnant' or 'not pregnant'. Always check the card's instruction leaflet, different brands use different markings.
Timing matters. Test first thing in the morning when hCG concentration is highest, especially before your missed period. Wait the time the manufacturer recommends, usually three to five minutes. Reading too early or too late can give false negatives or evaporation lines that look like faint positives. If the test shows a faint second line, treat it as a possible positive and repeat in two days.
Storage and handling affect accuracy. Keep cards in a dry place at room temperature and use them before the expiry date. Don't open the foil wrapper until you are ready to test. Avoid touching the absorbent tip. If you have diluted urine from drinking a lot of fluids, the test may miss early pregnancy.
False negatives are common early on. Implantation can occur days after conception, delaying hCG rise. If you tested too soon, wait 48 hours and test again. Certain medications and medical conditions can alter results. Rarely, a chemical pregnancy produces a positive test followed by a period. False positives are uncommon but can happen with recent pregnancy loss, some fertility drugs, or rare medical issues.
What if results conflict with symptoms? If you have pregnancy symptoms but a negative test, repeat testing or get a blood test. A quantitative hCG blood test at a clinic can detect lower hormone levels and track whether hCG rises appropriately. If you get a positive home test, contact a healthcare provider to arrange confirmation and prenatal care.
Quick checklist before you test: check expiry date, test with first morning urine, follow instructions exactly, set a timer, and repeat after 48 hours if unsure. Keep a photo of the result if you need to show it to a clinician. If you use tests frequently because of fertility treatment, discuss testing strategy with your provider to avoid confusion.
Understanding your pregnancy test card makes early steps clearer and less stressful. Use the test correctly, trust a blood test if doubts remain, and contact your doctor for next steps. Common signs to watch for include a missed period, nausea, breast tenderness, fatigue, light spotting, or cramping; if you experience severe pain, heavy bleeding, fever, fainting, or sudden shoulder pain, seek emergency medical care immediately, call emergency services now.
The history of the pregnancy test card: A brief overview
In today's post, I want to give you a brief overview of the history of the pregnancy test card. The journey of this essential tool dates back to ancient Egypt, where women would urinate on seeds and observe their growth as an indicator of pregnancy. Fast forward to the 20th century, the first modern pregnancy test was developed in 1960, using a hormone called hCG as the primary indicator. The 1970s saw the invention of the first home pregnancy test kit, forever changing the way women discovered they were expecting. Since then, pregnancy test cards have evolved into the convenient and accurate tool we know and rely on today.
VIEW MORE
